


Like most dog parents, you love taking your furry friend everywhere, even on road trips. But if your pup is getting older or has mobility issues, hopping in and out of the car can be challenging. That’s where a dog ramp comes in handy!
A dog ramp for a car can make it easier for your four-legged friend to get in and out of the vehicle without putting strain on their joints. Plus, it’s a great way to keep them safe while traveling.

- Decide on the size of the ramp.
- It should be long enough for your dog to comfortably walk up but not too long that it’s unwieldy to carry or store
- Cut two pieces of lumber to the desired length
- Sand down any rough edges
- Place the pieces of lumber side-by-side and screw them together with wood screws every few inches.
- Cover the ramp with nonslip material such as carpeting or rubber matting
- Secure in place with staples or glue
- Test the ramp out with your dog before using it to make sure it is sturdy and safe
DIY Folding Dog Ramp for Car
Assuming you would like a blog post on how to make a dog ramp: A dog ramp can be a great addition to your home if you have a pet that is older, injured, or has arthritis. If you have a small dog, you may even be able to find a ready-made ramp at your local pet store.
But for larger dogs, you’ll likely need to make your own. Here’s how:
- Decide on the size of the ramp. It should be long enough so your dog can comfortably walk up and down it without making too steep of an angle. It should also be wide enough so that they can comfortably walk up without feeling cramped. A good rule of thumb is 1 foot of ramp per 10 inches (so for a 24-inch tall dog, you’ll need a 2.4-foot long ramp).
- Choose the material for your ramp. Wood is often the best choice as it’s sturdy and won’t slide around easily when your dog uses it. But if you’re worried about weight, aluminum or plastic may be better options. You could also use carpeting or nonslip rubber matting to provide traction and prevent slipping (make sure it’s securely attached, so it doesn’t move around).
- Cut the pieces for your ramp according to the dimensions you decided in step 1. If using wood, sand down any rough edges before proceeding to step 4.
- Assemble the pieces of your ramp by screwing or nailing them together (if using wood). Ensure everything is secure and that no sharp edges could hurt your dog while using the ramp. 5 place the Ramp in position & test it out with Your Dog
There is no definitive answer to this question as it depends on several factors, including the size and breed of the dog, the height of the ramp, and the surface on which it will be placed. Some experts recommend a slope of around 20 degrees for small dogs, while others suggest a steeper incline for larger breeds. Ultimately, it is essential to experiment with different pitches to see what works best for your dog.
Start with a gradual incline and increase the angle as needed. If your dog seems uncomfortable or struggles to use the ramp, try lowering the slope until it can safely navigate it.
If you have a dog that needs help getting in and out of the car or up and down the stairs, you may be wondering what the best material is for a dog ramp. Many materials can be used for dog ramps, but some are better than others. The best material for a dog ramp is durable and slip-resistant.
You also want to ensure that the ramp is light enough to be easily portable yet heavy enough to stay in place when your dog uses it. Wooden ramps are popular with many dog owners because they are solid and sturdy. However, wood can be slippery when wet, so you may consider adding a nonslip surface to the ramp.
Metal ramps are another option, but they can get very hot in the summer sun and cold in the winter weather. Plastic ramps are lightweight and easy to move around, but they’re not as durable as metal or wood ramps. If you choose a plastic ramp, look for one that has ridges or grooves on the surface to help prevent your dog from slipping.
Whether changing the oil or washing the underside, you can easily make one at home with just a few household items if you need to get your car up on a ramp. All you need is a piece of plywood at least 2 feet wide and 4 feet long, two saw horses, and something to use as a support in the middle of the ramp (a milk crate or stool will work fine). Once you have your materials gathered, follow these simple steps:
- Place the piece of plywood on top of the two saw horses to form a slope. The steeper the incline, the shorter your ramp will be.
- Place your support in the middle of the ramp. This will help prevent the plywood from sagging in the middle when weight is applied.
- Use some tie-down system ( ropes, bungee cords, etc.) to secure the ramp to both saw horses. This step is essential because it will keep your ramp from moving around while you’re driving up or down it.
- And that’s it! Your homemade car ramp is now ready for use.
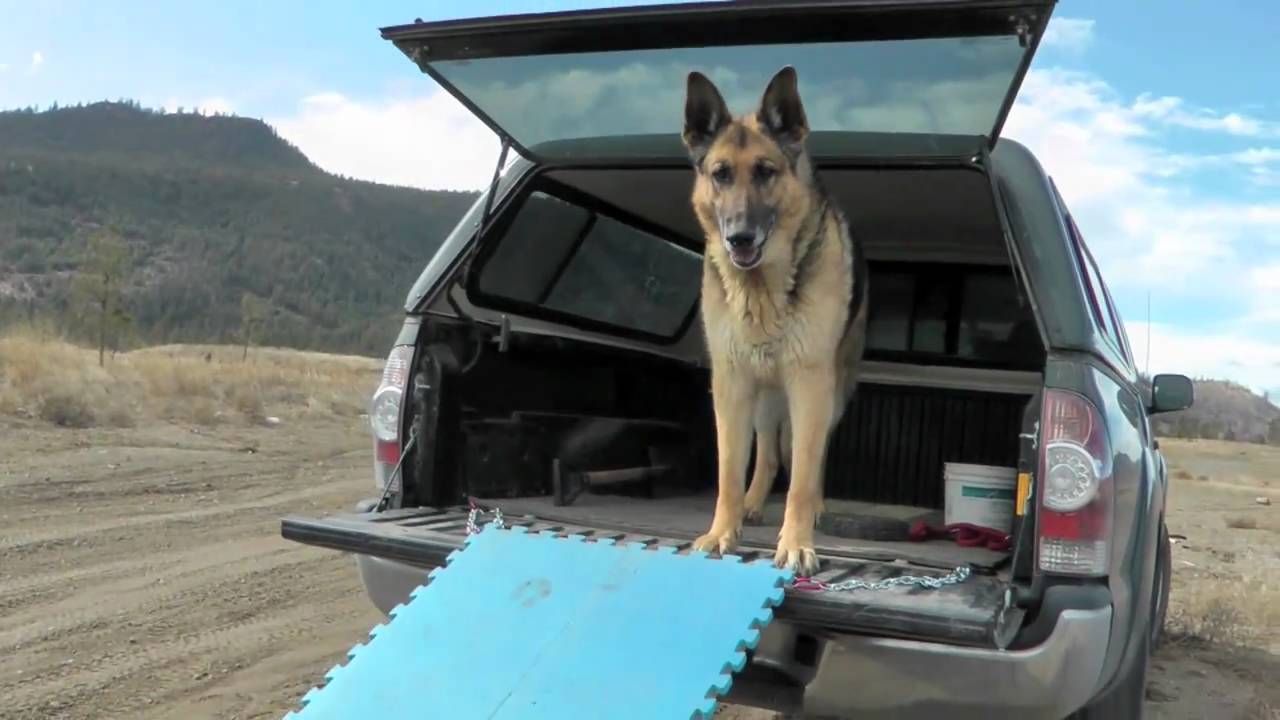
Credit: www.youtube.com
How to Build a Folding Dog Ramp for Car
A folding dog ramp may be the answer if your dog is having trouble getting in and out of your car. These ramps can be bought at most pet stores or online, but they can also be quickly built at home with a few simple materials. The first step is to measure the height of your car’s door opening and the distance from the ground to the top of the door opening.
You will need a piece of plywood at least as wide as the door opening and long enough to extend from the ground to the top of the door opening. If you want extra support for the ramp, add a crosspiece of wood to the center of the plywood. Next, mark where you will need to drill holes for hinges along one long side of the plywood.
Drill these holes and then attach hinges to them. Be sure that the hinge pins are on top when you fold up the ramp, so they don’t get in your way when using it. Now it’s time to add some traction to your ramp, so your dog doesn’t slip when he or she is using it.
You can do this by stapling carpeting or strips of nonslip matting onto both sides of the ramp. Make sure that whatever material you use extends along both sides and over both ends so there are no gaps where your dog could slip through. You’re almost done!
The last step is to test your new ramp and make any necessary adjustments before letting your pup use it independently. Once you’re confident that it’s safe and sturdy, put it next to your car whenever you need it, and watch how much easier life becomes for you and your four-legged friend!
Inexpensive Diy Dog Ramp for Car
If you have a dog, chances are you’ve been in a situation where your furry friend needs to get in or out of the car but can’t quite manage it on their own. A ramp can be a big help for dogs with mobility issues, and it doesn’t have to be expensive or difficult to DIY. With a few simple materials, you can make an inexpensive ramp that will make life easier for you and your pup.
To start, you’ll need some base material. Plywood is cheap and easy to work with, but if you’re worried about slipping, you could also use carpeting or rubber matting. Cut the base material to size – it should be long enough to reach from the ground to whatever surface your dog needs to access (the back of an SUV, for example).
Once you have your base cut out, attach some non-slip surfaces. This can be more carpeting, matting, or even just sandpaper glued down. Next, add sides to keep your dog from falling off the sides of the ramp.
You can use anything from PVC pipe to 2x4s – whatever you have on hand and feel comfortable working with. Make sure the sides are tall enough that your dog can’t accidentally step over them (a good rule of thumb is at least as tall as your dog’s shoulder height). Attach the sides using screws or nails – whatever you’re most comfortable with.
And that’s it! Your DIY dog ramp is now complete. If necessary, add a bit of weight to the bottom, so it doesn’t slide around when in use.
How to Build a Dog Ramp for Bed
If your dog is getting older or has mobility issues, you may find that they have trouble getting on and off of your bed. A dog ramp for bed can help make things easier for you and your furry friend. Here’s how to build a dog ramp for a bed:
- Start by measuring the height of your bed from the floor to the top of the mattress. You’ll need to know this measurement so you can build a ramp that is the correct size for your bed.
- Cut two pieces of plywood to this measurement. These will be the sides of your ramp.
- Cut another piece of plywood to half the width of your bed, plus two inches. This will be the base of your ramp.
- Attach all three pieces of plywood with screws or nails, making sure that the base piece is centered between the two side pieces.
- Cover all exposed wood edges with duct tape or similar material to create a smooth surface and prevent splinters. If desired, you can cover the entire ramp with carpeting or other material to match Six your décor. Once finished, set the ramp next to your bed so your dog can use it immediately!
Conclusion
A dog ramp for cars can make life much easier for you and your pet. It allows them to get in and out of the vehicle without jumping, which can be difficult for some dogs. Here is a step-by-step guide on how to build a dog ramp for your car:
- Decide where you want to place the ramp. You’ll need to measure the height of your car’s door opening and the length of the ramp.
- Cut two pieces of plywood, each 2 feet wide and 8 feet long. These will be the sides of the ramp.
- Place one piece of plywood horizontally on top of the other, so they are 4 feet wide by 8 feet long. This will be the base of the ramp.
- Drill holes every 6 inches along both sides of the base piece, about 1 inch from each edge. Countersink these holes so that the screws will sit flush with the wood’s surface when installed later on.
- Cut eight 2 x 4 boards 4 feet long .these will be used as supports for the ramp. Six 6-footers will also work if you do not have any 8-footers available. Make sure they’re all cut at exactly 4 feet so everything lines up correctly later.
Determine how many boards you’ll need by holding them up against The underside Of The Ramp And Spacing Them Out Evenly. Once you know how many you need, mark their placement With A Pencil On The Underside Of The Ramp, So You Know Where To Drill Holes For Attaching Them Later. Make sure these marks are evenly spaced out!